
Available In-Store Materials:
6x6 canvas
Ink: Tim
Holtz Distress Walnut Stain, Distress Vintage Photo
Paper: Penny
Black Script Foil White #60-005
Metal: Tim
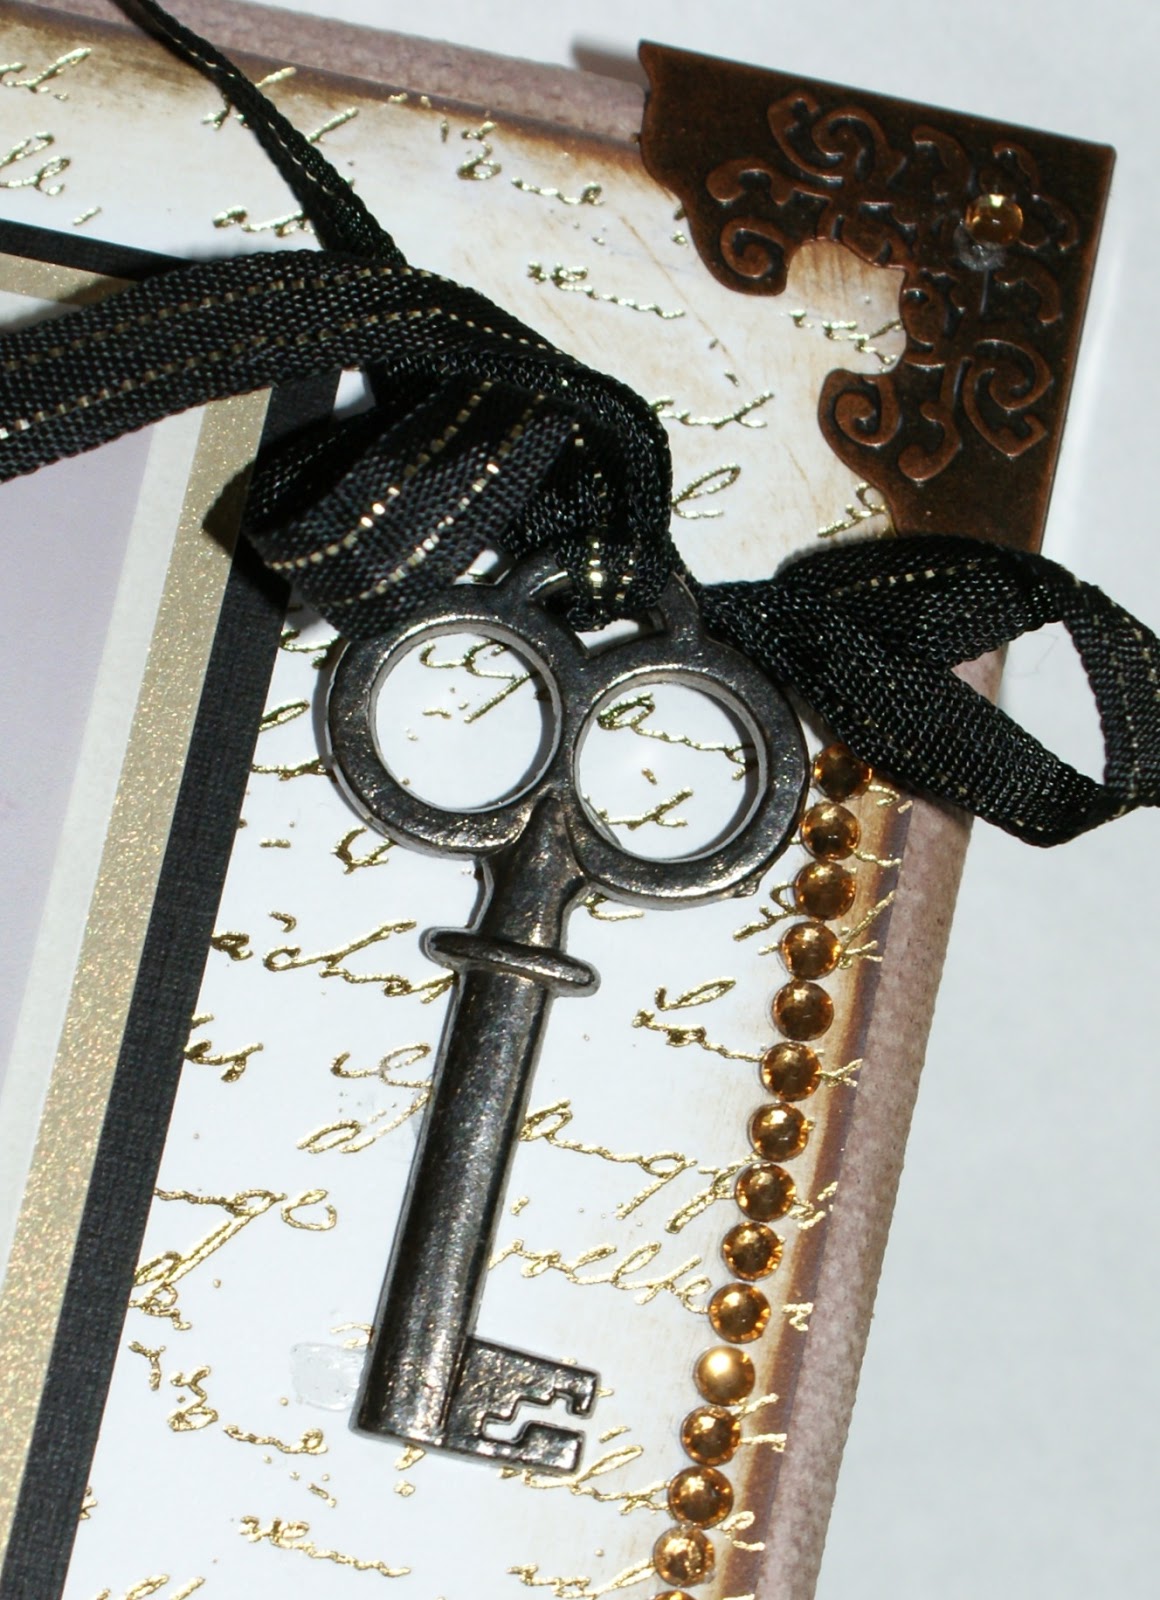
Holtz Ideology Corners
Lace: Webster’s
Pages Trim & Ribbons in Gold Lace
Paper Flowers:
Kaiser Craft Paper Blooms
Pop Dots
Personal Stash:
Key: Although
Tim Holtz has amazing keys, this particular one has been in my drawer ‘forever’
Black/Gold Ribbon:
Used to tie key is a remnant from my fabric bin
Black Velvet Ribbon:
Used on left side of canvas over lace is a remnant
Bling: Not
sure of its origins but Kaiser Craft makes similar items
Instructions:
The great thing about canvas projects is that they
can be themed. Mine is a wedding theme,
but I have done similar projects for Back to School, Father’s Day, and Baby
Announcements. The important thing is to
decide on the image, select complementary colors and an overall color palette. For this project my color palette was white,
gold, and brown with hints of black.
1.
Take 6x6 canvas and ink sides. I
used Distress Vintage Photo ink for the sides of the canvas. Where the sides meet the top I used an extra
‘swipe’ of Distress Walnut Stain to darken the effect. Let dry – but it shouldn’t take too long
because you are not saturating canvas, just ‘swiping.’
2.
Cut paper approximately 5.75” square.
3.
Ink edges of paper with Distress Walnut Stain and use your favorite
adhesive to adhere paper to canvas.
4.
Measure your lace before you cut – if you wish to achieve the wavy effect
I used in my project, you will need to cut more than 6” of lace. Practice
before you cut. The amount of lace will
be determined by how much wave you would like to achieve.
a.
The lace I selected was wide so I cut it down the middle. The idea of the lace is to enhance your
project, not overtake it.
b.
You do not need to create folds; my personal preference is to create as
much texture as possible so the wavy effect appeals to me. You could simply lay your lace straight
across the canvas.
c.
Tip: If you sew, you could run a
wide stitch (gathering stitch) and pull gently to create a ruffle.
5.
Once you have cut the required amount of lace, take gold lace ribbon
and use your fingers to create waves/folds along left border. Working in small sections use your favorite
adhesive to attach each section of lace to the paper.
a.
Tip: Be sure to wrap your lace
around the top and bottom of the canvas sides to create a finished look.
6.
Cut velvet ribbon approximately 7.75” and adhere with your favorite
adhesive to the gold lace.
a.
I used the black velvet ribbon because I had cut the gold lace in half
to achieve my desired effect – however, this produced a rough edge. The black velvet ribbon nicely covered the
unfinished edge.
7.
Place a Tim Holtz Ideology corner on each corner of your canvas. There are three different metal color tones
in each package, select the one that works best for your color palette. Adhere with a strong adhesive, I used book
binding glue. For the corners with the
lace/ribbon you may wish to use a large ‘gator clip’ to ensure strong adhesion.
8.
Photo – I like to use multiple mattes. Attach the photo onto a white matte and then a
gold tone matte. Before I attached the
photo and white/gold mattes to the black matte I used Pop Dots to create
dimension. I then attached the
photo/mattes to the canvas, slightly under the gold lace.
9.
Kaiser Craft Paper Flowers – I used five flowers to ‘corner’ my
photo. I like to work in odd numbers for
art projects and three wasn’t enough and seven was too much. Again, personal preference – choose what
works for you.
10.
Key – Tie a small ribbon around your key and depending on the weight of
the key use an appropriate glue medium.
Make sure your ribbon bow has enough fabric to gently flow over the
canvas.
11.
Bling – I used a bling string along the right edge of the paper. Close to the inked edge, but not covering
it. I took a couple of stray bling
jewels and placed one on each Ideology corner to tie the look together.


1 comment:
Awesome project!!
Post a Comment