Pages

Showing posts with label Awesome Empoyee. Show all posts

Thursday, April 11, 2013

Copics are Michele's Favorite This Week!

My favorite product this time around is Copic Markers!   
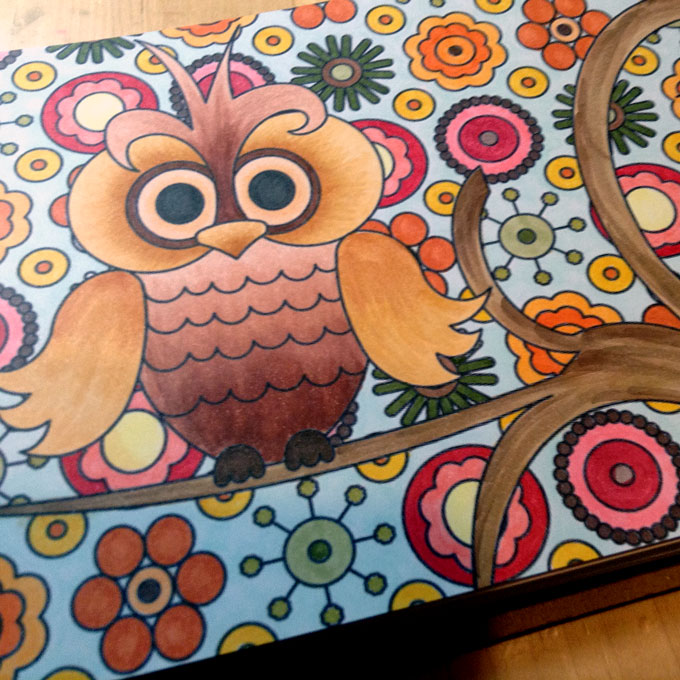


I have loved to color since I was a little girl- the huge box of 64 crayons was always a favorite gift for me.   I loved all the colors and shading by pressing harder or softer when coloring.   As a grown up I still love to color but now I mostly use my Copics!


I fell in love with Copics (pronounced "cope-icks") when we first started carrying them - I love the huge variety of colors but more than that I love how easy they are to blend!   I feel like they made my coloring look much better than it really is
.  


Coloring for me is a stress reliever and mostly just for fun - and while I have created cards with them mostly I just color in my personal Copic coloring book!    I made this book (using my WRMK Cinch) using Copic paper and a few printouts from the Internet.  


I keep a log of the color chart, color combos I like, and stamped images - some are mine, some are friends' stamps, some are samples from online.   I also have a sheet of acetate that is removable so I can place it behind whatever image I am working on so it doesn't bleed through.


I also happen to be one of the Copic teachers at the store - so I get to share my love of Copics and teach others how fun they are!!!!!

Michele

Tuesday, April 9, 2013

Chalkboard Style Name Tags

Hi There!

I wanted to share a little project I worked on recently- our new store name tags!


Name tags in general need to be easy to read and let people know that whoever is wearing one is an employee.  Since we are a scrapbooking store, we needed to kick ours up a notch and also make them creative and cute!

I have been loving the chalkboard craze that is popular right now and decided to use that as my inspiration for our new tags.  With only a few supplies and my stash of  Lawn Fawn stamps I got to work creating!


I used Lawn Fawn's Quinn's ABC's to stamp our names.  I used smaller stamps from many of their other sets as accents to make each tag unique.  I added fish and bubbles  from the Critters Under the Sea set to Andrea's!  Pam's features the happy sunshine from the Sunny Skies set!


The chalkboard look is easy to achieve!  You need a few products: cute stamps, black cardstock, Versamark ink, white pigment ink, white embossing powder, a white pen, and a sponge or blending tool.  I also used a white mist to add some speckles.  Here are the steps I took to create this tag:

1. Cut or die cut tag from smooth black cardstock.  Punch a circle and adhere it where you want to add your ribbon later.  Cut off excess circle bit.

2. Stamp your name using Versamark ink and emboss using white embossing powder and your heat gun.  I did as many letters as I could in one shot but if I had to stamp it twice because the name was longer, I embossed between stamping.  I also used an Embossing Buddy to keep the stray embossing powder flecks away.

3. Stamp your accent stamps using Versamark ink and emboss using white embossing powder.

4. Doodle a line around the outside edge with your white pen.  You can use a ruler if you have a hard time with straight lines but I like the imperfect look you get without one even more!

5.  Once your pen work is dry, get out your sponge or blending tool and your white ink.  Sponge around the edges first, rubbing towards the center.  Lightly sponge some ink in a few different spots as well to create that dirty chalkboard look

6.  Flick a little bit of white mist on to the tag if you like that look!  Finish off your tags with pretty ribbon and twine!


Now just because we made name tags with this fun technique doesn't mean you have to!  I think it would work great on cards, scrapbook pages and on Project Life inserts!  I hope we've inspired you to get out your stamps and try the chalkboard technique!

Thanks for stopping by today!

-tessa

Thursday, March 14, 2013

Silhouette Heat Transfer Material


Hi everyone!  It’s Rachael, and I can’t wait to talk to you about one of my new favorite products, Silhouette’s Heat Transfer Material.  Heat Transfer Material is used with a digital cutting machine.  It is made specifically for the Cameo, but can be used in other machines, like the Cricut, as well. 

I love to make custom t-shirts for my children.  I also love to make custom onesies as baby shower gifts.  Heat Transfer Material is perfect for these projects.  Simply choose an image or phrase to cut out, create a mirror image of it in your design software, then follow the directions on the box to load the Heat Transfer Material into your machine.  After your image is cut, you peel the excess material away, and place the image on your shirt.  A little ironing later and Voila!, a custom creation that will be a hit.  Here’s an example of a shirt I made for my daughter for President’s Day:


You can iron heat transfer material onto many different fabrics, so the project ideas are endless, hats, bags, favors for parties, the list goes on an on.  Stop by the store today and check out our selection of colors and styles, and get busy working on all those fabulous ideas in your head!

Happy crafting!
Rachael